How to Build a Screened-In Porch: Step-by-Step Guide for a Perfect Outdoor Retreat
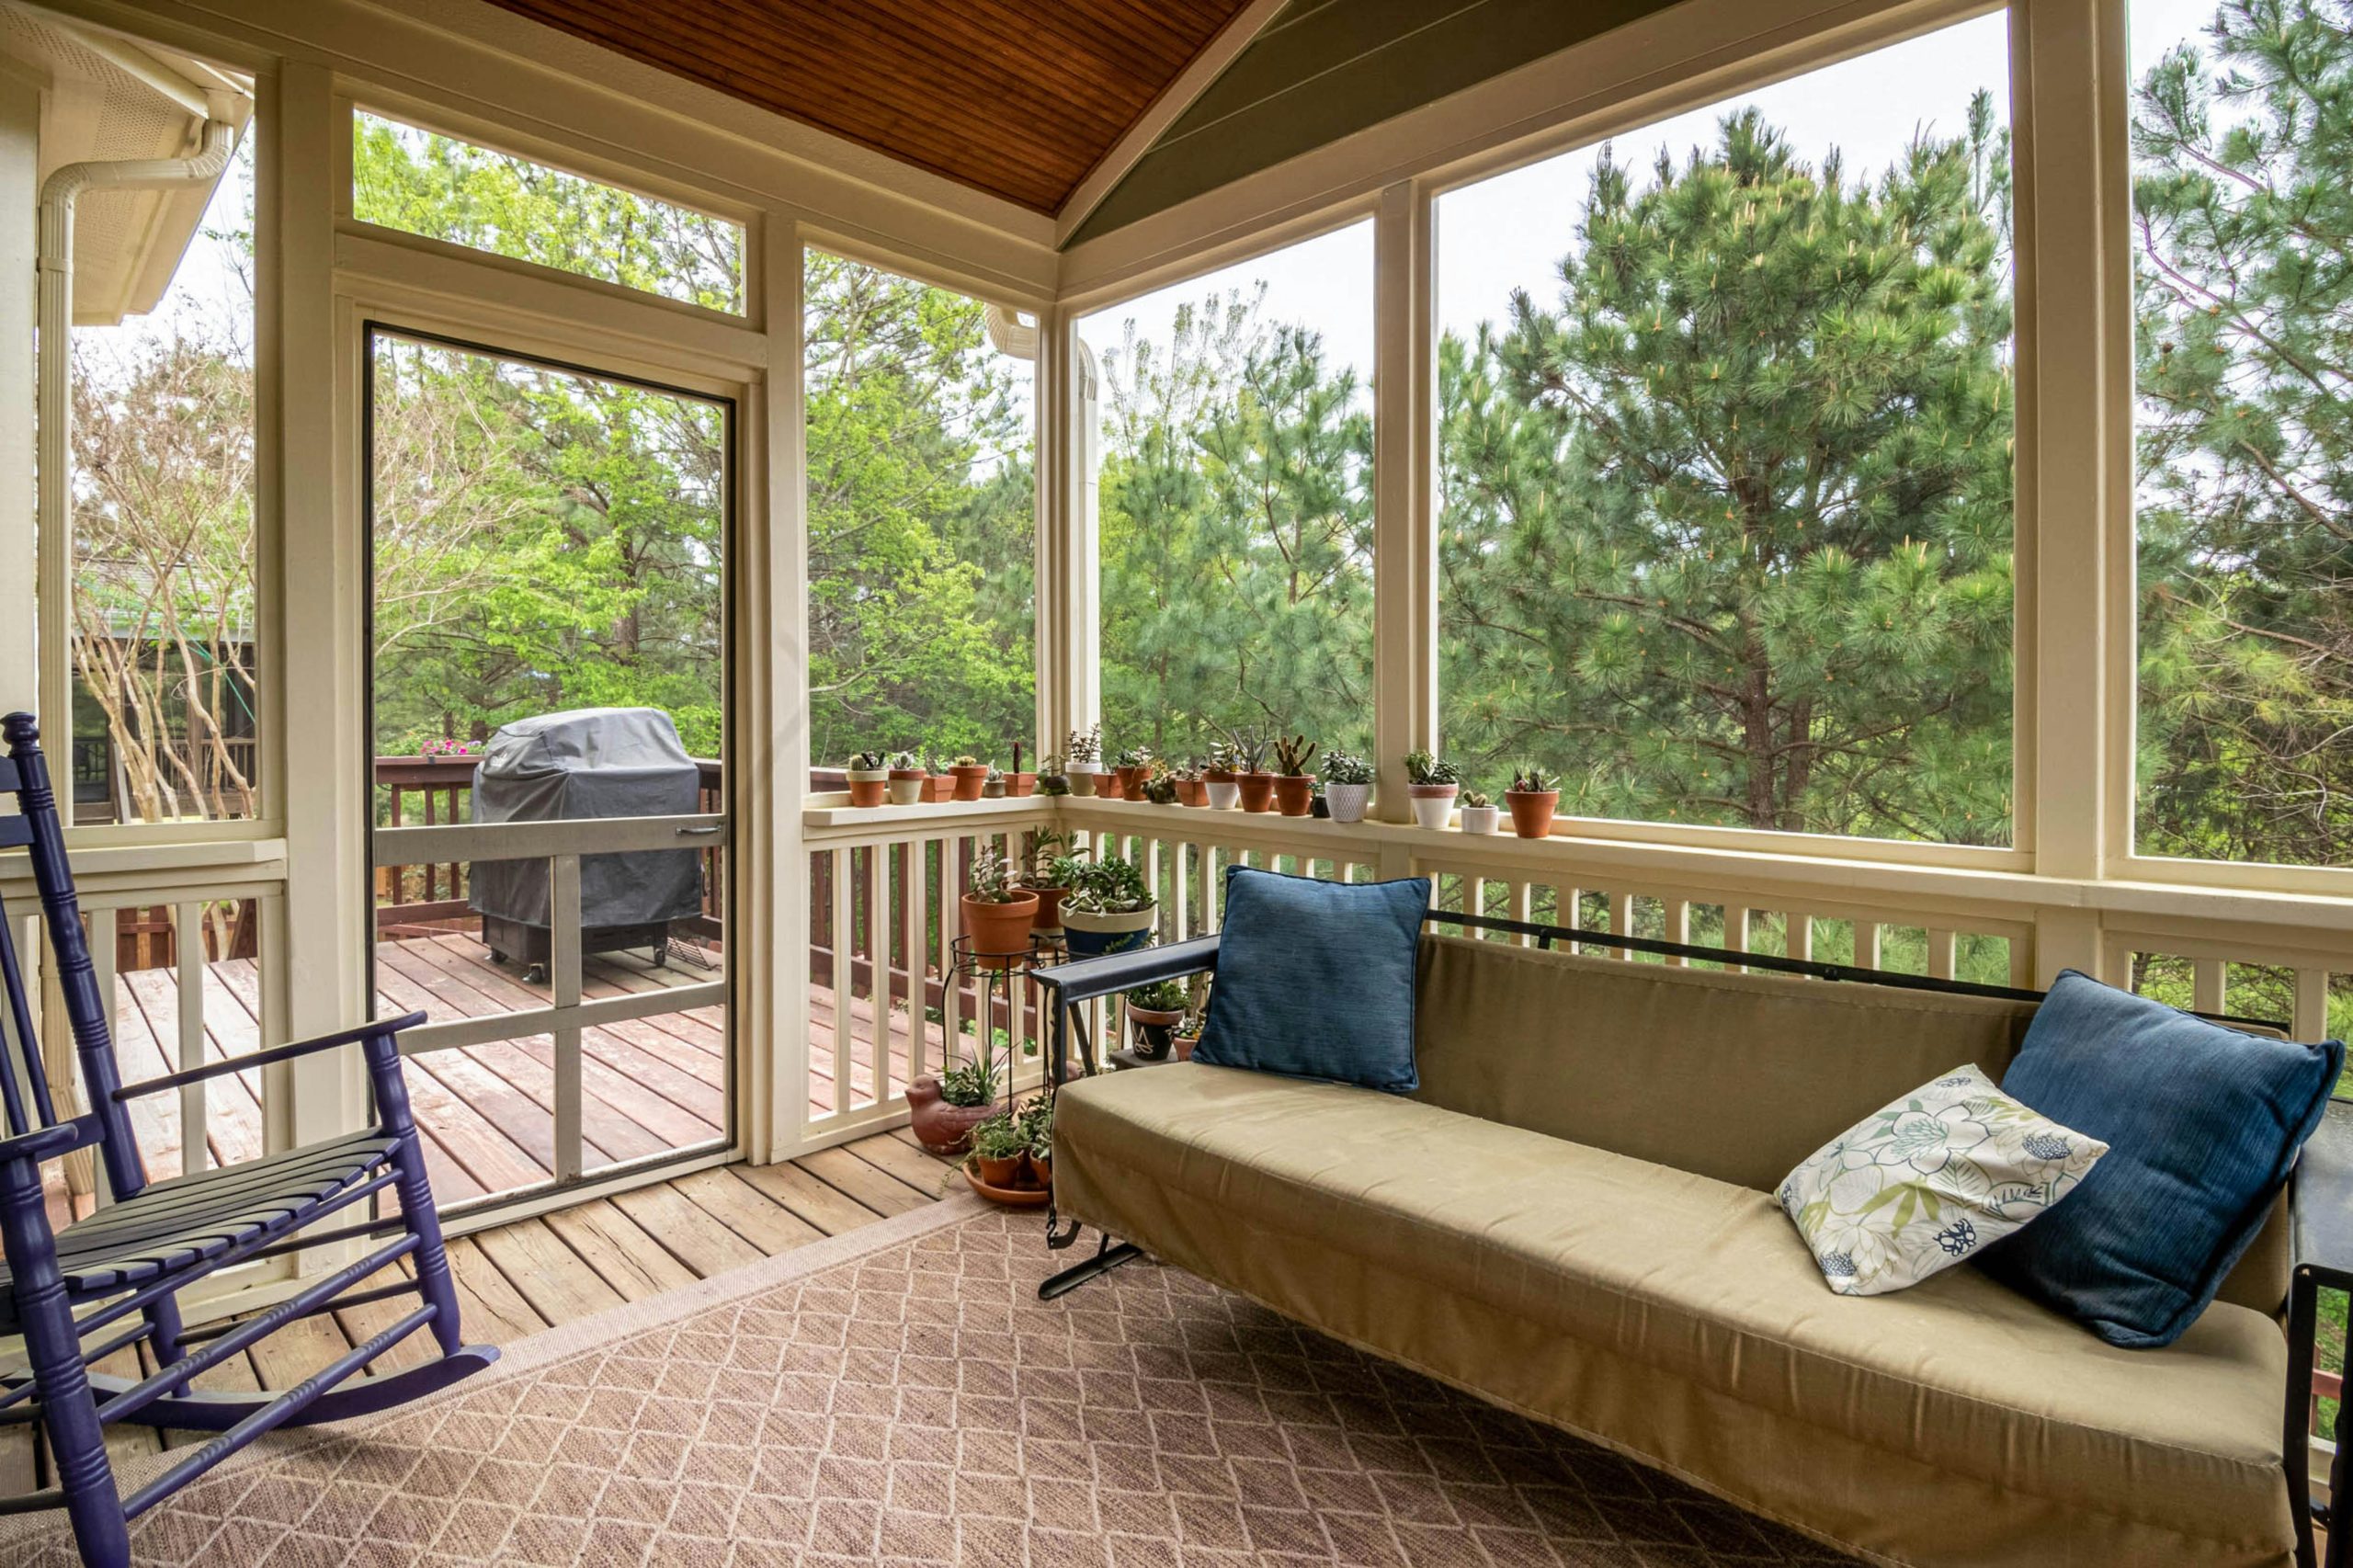
A screened-in porch offers the perfect blend of outdoor enjoyment and indoor comfort. It provides a peaceful spot to enjoy the fresh air without dealing with birds, insects, harsh sun, or unpredictable weather. Building your own screened-in porch can be a rewarding DIY project that adds value to your home and enhances your lifestyle. This comprehensive guide will walk you through each step of the process, from planning and material selection to construction and finishing touches.
1. Planning and Design
Before you begin construction, careful planning is essential to ensure your screened-in porch meets your needs and fits your home’s design. Start by considering the following key aspects:
Assess Your Needs
- Purpose: How will you use the porch? Whether you plan to use it for dining, relaxing, or entertaining, your intended purpose will influence the size and layout.
- Location: Determine the best spot for your porch, considering factors like sun exposure, wind direction, and privacy.
- Size: Decide on the dimensions of the porch. The size should accommodate furniture and allow for comfortable movement while fitting within your available space.
Check Local Building Codes
Before building, consult your local building codes and obtain the necessary permits. Many municipalities require permits for any new construction or structural additions, and failure to comply can result in fines or the need to remove the structure. Building codes also regulate issues like:
- Setback requirements (distance from property lines)
- Foundation types
- Roof height and style
- Electrical wiring and outlets (if needed)
Select a Design Style
Consider how your porch will complement the overall look of your home. Popular porch styles include:
- Traditional screened-in porches: Featuring simple wooden framing with screens, offering a timeless and functional design.
- Modern porches: Clean lines and minimalistic details with materials like aluminum or steel for a contemporary look.
- Rustic porches: Natural materials such as wood and stone blend seamlessly with nature and create a cozy atmosphere.
2. Gather Materials and Tools
Once you have a plan, gather the materials and tools needed for the project. Below is a list of common items you will need to build a screened-in porch:
Materials
- Pressure-treated wood: For framing, posts, and supports, pressure-treated lumber resists rot and insect damage.
- Screening material: Fiberglass and aluminum are the most common options, with fiberglass being more flexible and easier to install.
- Roofing materials: Asphalt shingles, metal panels, or wood shingles are suitable roofing materials depending on your preference and the style of your home.
- Screen frames: Aluminum or wood frames hold the screen material in place.
- Concrete: Used for the foundation and setting posts.
- Screws and nails: Exterior-grade fasteners are necessary to withstand weather conditions.
- Screen spline: A flexible cord that holds the screen in place within the frame.
Tools
- Saw: Circular saw or miter saw for cutting wood to size.
- Power drill: For driving screws and drilling holes.
- Tape measure: Accurate measurements are crucial throughout the process.
- Level: Ensures the structure is properly aligned and leveled.
- Staple gun: For securing screens to the frames.
- Hammer: For nailing framing pieces and securing trim.
- Trowel: For spreading and smoothing concrete.
- Chalk line: Helps you mark straight lines for cutting or placement.
3. Building the Foundation
The foundation is one of the most critical parts of the screened-in porch, providing stability and support. There are several options depending on your home’s structure and landscape:
Concrete Slab
A concrete slab foundation is ideal for level ground and provides a solid, durable base for your porch. To create a concrete slab:
- Mark the area where the porch will be built.
- Excavate the area, removing grass and topsoil to create a level surface.
- Build a frame using 2×4 lumber to contain the concrete.
- Pour the concrete, using a trowel to level the surface.
Allow the concrete to cure fully before proceeding with construction.
Pier Foundation
A pier foundation works well for uneven ground or elevated porches. It involves setting concrete piers at strategic points to support the structure:
- Dig holes for the piers at the corners and other key support points of the porch.
- Insert pier forms and fill them with concrete, ensuring they are level.
- Once the concrete sets, attach post anchors to the top of each pier to hold the vertical support posts.
4. Framing the Porch
With the foundation complete, you can begin framing the porch. The framing provides the structure and support for the walls, screens, and roof.
Install Support Posts
Begin by installing vertical support posts around the perimeter of the porch:
- Measure and cut the posts to the desired height.
- Anchor the posts to the concrete foundation or pier footings using metal post brackets or anchors.
- Use a level to ensure each post is plumb (vertically straight) before securing it in place with screws or nails.
Build the Floor Frame
If you’re not using a concrete slab, you’ll need to construct a wooden floor frame:
- Attach horizontal beams between the support posts to create the floor frame.
- Install floor joists within the frame, spacing them according to the type of flooring you plan to use.
- Lay the decking material (such as pressure-treated wood or composite boards) on top of the joists, securing them with screws.
Construct the Wall Frames
Next, construct the frames for the walls where the screens will be installed:
- Cut 2×4 lumber to the appropriate lengths for the top and bottom plates of the wall frames.
- Install vertical studs between the top and bottom plates, spacing them evenly (typically every 16 inches).
- Secure the wall frames to the support posts, ensuring they are level and properly aligned.
5. Installing the Screens
Once the porch is framed, it’s time to install the screens that will enclose the space:
Attach Screen Frames
To create a clean, professional look, use pre-built screen frames or build your own using aluminum or wood:
- Measure the openings in the wall frames to determine the size of the screen frames.
- Cut the screen frames to size using a saw.
- Secure the frames within the wall openings using screws or brackets.
Install the Screens
With the frames in place, you can install the screen material:
- Cut the screen material to size, leaving a few extra inches on each side.
- Lay the screen over the frame and use a staple gun to secure it to the frame, starting at the top and working your way down.
- Use screen spline to secure the screen tightly within the groove of the frame, ensuring it is taut and wrinkle-free.
- Trim any excess screen material.
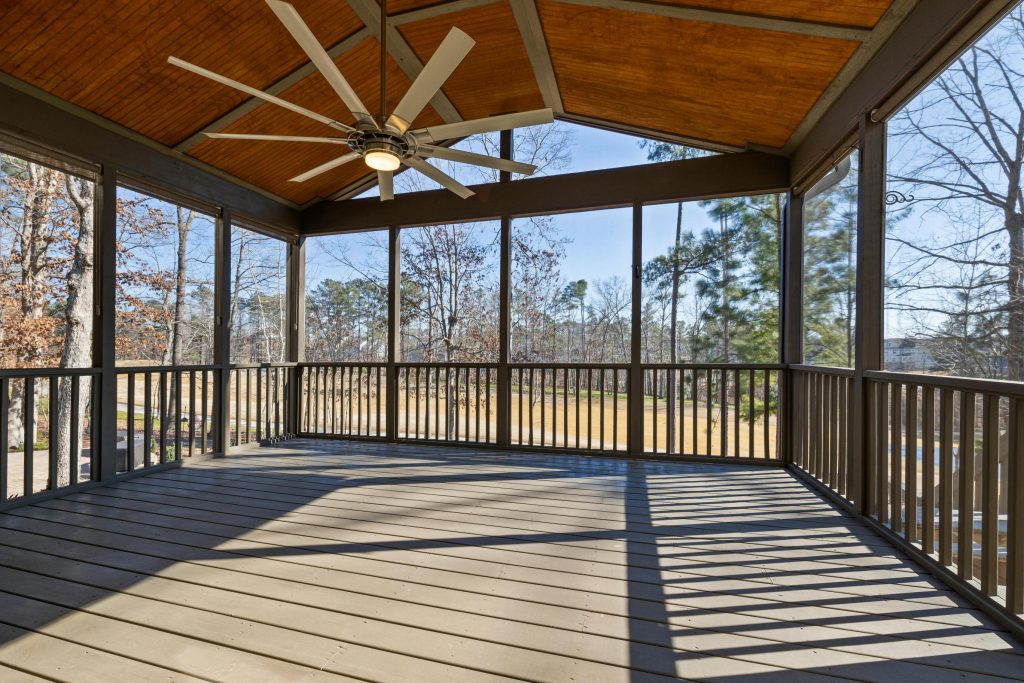
6. Adding the Roof
The roof is an essential part of your screened-in porch, providing shelter from the elements and completing the structure.
Attach Roof Beams
- Install horizontal roof beams (also known as rafters) between the top of the support posts.
- Ensure the roof beams are level and secured firmly to the framing.
Install Roofing Material
Depending on the roof style and materials you’ve chosen, install the roofing materials:
- Asphalt shingles: Attach plywood sheathing to the rafters and cover it with asphalt shingles for a traditional look.
- Metal panels: Attach metal roofing panels directly to the rafters for a modern, durable finish.
- Wood shingles: For a rustic touch, install wood shingles over plywood sheathing.
Make sure the roof is properly sloped to allow for rainwater drainage, typically with a minimum slope of ¼ inch per foot.
7. Finishing Touches
With the main structure complete, focus on finishing touches that will enhance the look and functionality of your screened-in porch.
Install Doors
A screened-in porch needs at least one entry point, typically a screen door. Install the door by:
- Attaching hinges to the door frame.
- Mounting the door to the porch’s frame, ensuring it swings smoothly.
- Installing a latch or lock to secure the door when not in use.
Add Trim and Paint
For a polished appearance, add trim around the edges of the porch and where the screens meet the frames:
- Cut and install wooden trim around the perimeter of the screens and roof.
- Caulk any gaps to protect against water intrusion.
- Paint or stain the wood to match your home’s exterior or porch style.
Consider Electrical Work
If you plan to use your porch in the evenings or want to install ceiling fans, consult an electrician to add wiring for lights, fans, or electrical outlets. Be sure to follow local building codes and safety standards for any electrical work.
Conclusion
Building a screened-in porch is a project that requires planning, precision, and effort, but the end result is a beautiful and functional outdoor living space. With the right materials, tools, and steps outlined in this guide, you can create a screened-in porch that enhances your home and provides a perfect retreat for years to come.
Remember, regular maintenance will help preserve the beauty and functionality of your screened-in porch, so be sure to inspect the screens and structural elements periodically, ensuring everything remains in good condition. With dedication and a little creativity, your screened-in porch will not only serve as an extension of your home but also as a cherished gathering place that offers comfort and connection to nature. Enjoy your new outdoor haven!